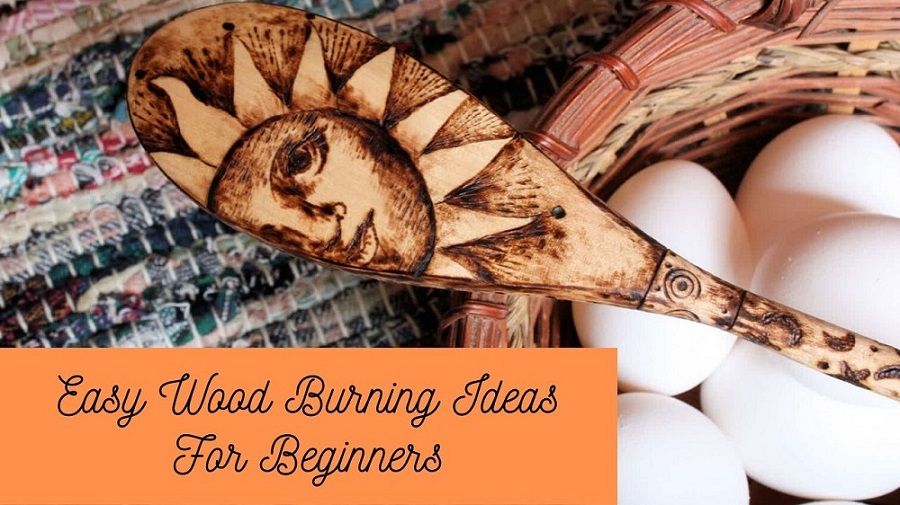
You know what sets children apart from the grownups?
It’s the ability to see and observe things from a totally different perspective!
For instance, if you ask a child if he could draw something for you, he would happily oblige!
As for adults, we would be definitely sweating bullets by now and start fussing what to draw, which color to use, how the finished picture should look like etc. etc. and might even end up staring at a blank canvas all day long!
Well, today we are NOT going to do that.
Instead, we will let our inner-child run wild, sharpen our creative skills and learn how to draw on wood with fire!
Let’s take a look at some easy wood burning ideas for beginners to get you started on the right foot!
What Is Wood Burning?
Pyrography, otherwise known as woodburning is an age-old technique of decorating wooden pieces with the help of a heated metal object.
The best part about woodburning is that you don’t need tons of supplies to create a pyro-graphic art for yourself!
Just a basic woodburning kit, a stand, tips, stencils and the right type of wood for you to sketch on would be enough for you to start burning right away!
However, the beginnings are always the hardest to get over with.
That’s why we recommend starting with one of the simple projects from our list that requires nothing more than a few pen strokes here and there to complete the whole look!
15 DIY Easy Wood Burning Ideas For Beginners To Try
#1. Mark The Territory!

Quiz for the garden-lovers out there: what’s the first thing you do just before the Spring season sets in?
Strip, snip and prune the twigs, of course!
Before you throw out these bad boys, let’s salvage some of them this season!
The idea is too simple.
Shave some part of the branches (preferably on the top to make it noticeable) and then use your pyrography pen to burn the name of the veggies on the sticks in a vertical pattern.
All that’s left to do is to plant them in front of the respective herbs and let them have their own territory to play with!
#2. A Welcome Wreath Never Feels To Impress
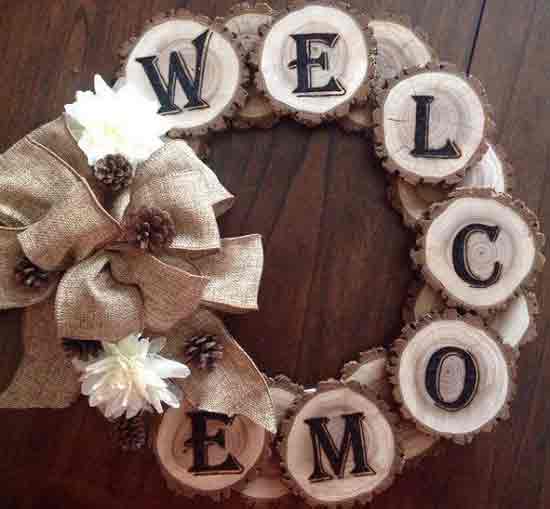
We spend a lot of time thinking about how to decorate the front of our house.
And that’s quite reasonable considering the fact that it’s the first thing visitors see when they step into your house!
Well, a round-shaped wreath, completed with a pretty bow on one side can be the perfect addition to your home décor as it lights up the mood in an instant!
Instead of fresh flowers (which is going to die eventually!), you can switch it up by using small circular planks as wreath beads, write the word “WELCOME” in singular pattern (‘W’, ‘E’, ‘L’, ‘C’, ‘O’, ‘M’, ‘E’) and hang it up on the front door for everyone to admire!
#3. A Thoughtful Gesture For The Special One
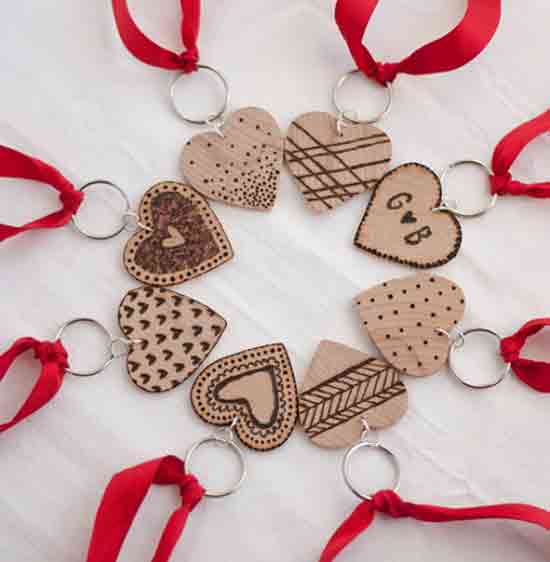
You can always buy the perfect Valentine gift if you have the money.
But you know what would be more AWESOME?
If you gifted your loved one something that you made from scratch!
An etched wooden heart keychain is a perfect example of that!
Cut small heart-shaped wood and put your signature design on top of that using a woodburning tool.
Hey! You can design literally anything you want!
But for a more-WOW effect, we suggest putting something extra sweet, like, a sign that bears meaning to only two of you or the initial letter of both of your names added using a cute “Heart” sign in the middle!
#4. Clever? YES, Crafty? No!
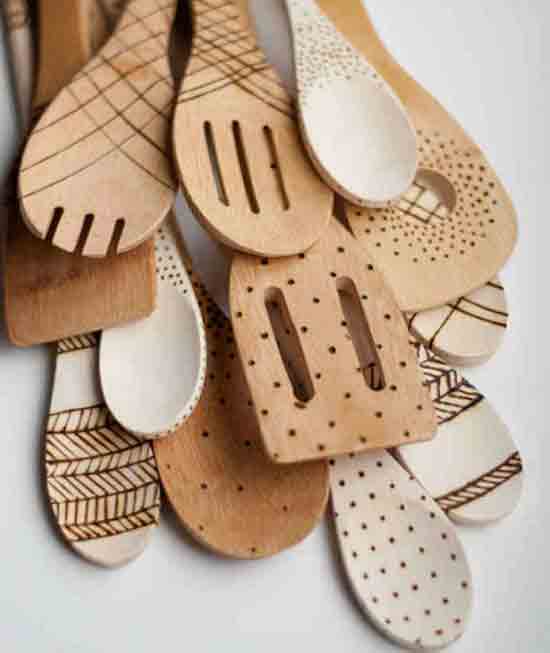
Never set your foot in the world of crafting?
Cool! Now let’s get started!
You see, I believe in trying out different things in life and have fun along the way even if you aren’t that much good at it!
Suppose, you don’t know even the ABCs of crafting. You can still try out our next idea, which is super-duper easy to make!
Grab a wooden spoon/spatula and your pyrography pen, then start decorating it with whatever pattern that comes to your mind.
You can draw little black drops, some vertical lines that cross each other at an intersection or a combination of both of these ideas if that’s all you can do!
#5. The More, The Merrier
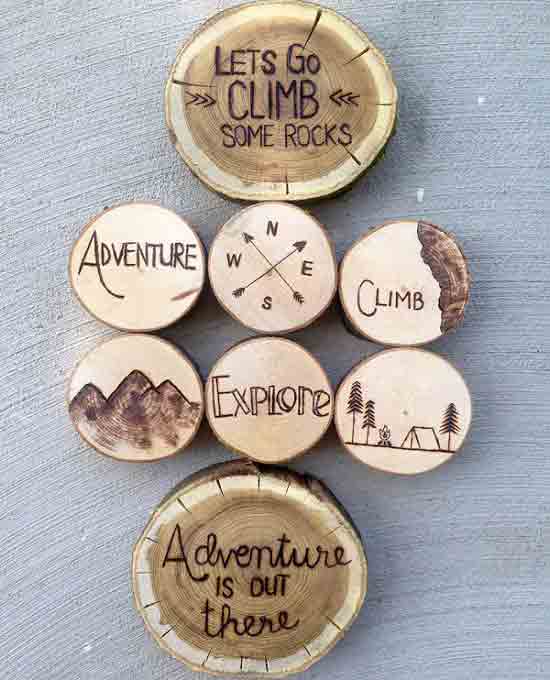
You can never have enough coasters on the table when the holiday season hits home and the foods in the dinnertime just keep coming!
While decorating the woods, don’t be ashamed to speak your hearts out!
In fact, it would be an excellent opportunity too show off your personality in written words.
For instance, if you are someone who likes to go on tours often, then you can make a bunch of adventure-themed coaster pieces for your dining table and let everyone know what’s on your mind!
#6. A Little Black Line Goes A Long Way
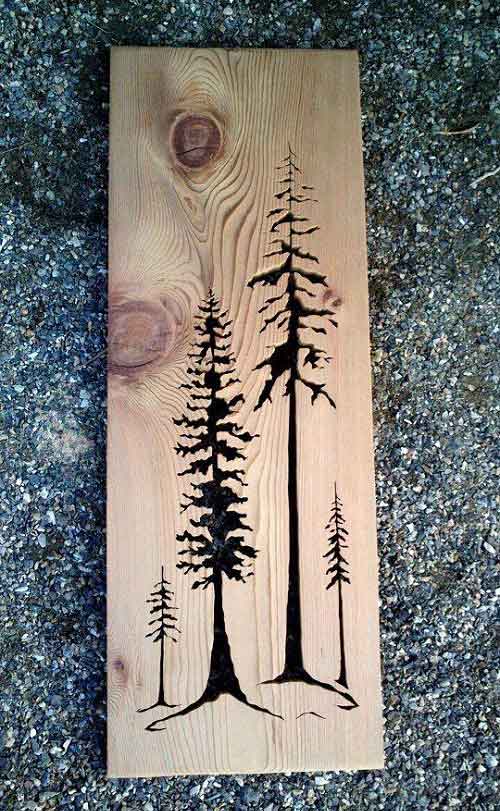
Another easy-peasy lemon-squeezy idea would be to draw tall trees on a plank of wood.
The advantage is that you don’t have to draw the fine details on this one!
Rather we are expecting you to draw a silhouette of tall trees, which can be done with just a few strokes!
Make the trees as tall as you can to take the focus away from its other parts. And don’t forget to fill in the gaps between the tree trunks and branches with the pyrography tool to complete the whole look.
#7. Laughter Is The Best Medicine After All!
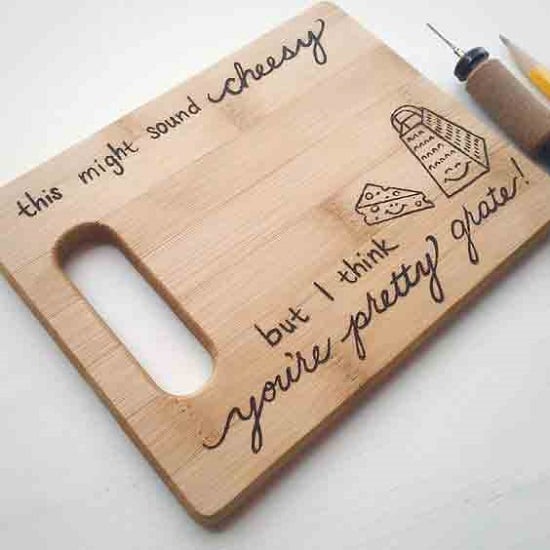
This one goes to the hopeless romantics who are always having a hard time to express their feelings!
And we are also adding a bit of laughter in the mixture to make them have a ROFL moment as well!
The idea is pretty simple.
You just need a cutting/chopping board to display a funny message written across it.
Of course, we encourage you to make your own custom-made message for your special one, but hey, if you run out of ideas, look up some memes on the internet to help you out!
#8. Give Your Photo Frames A Real Upgrade
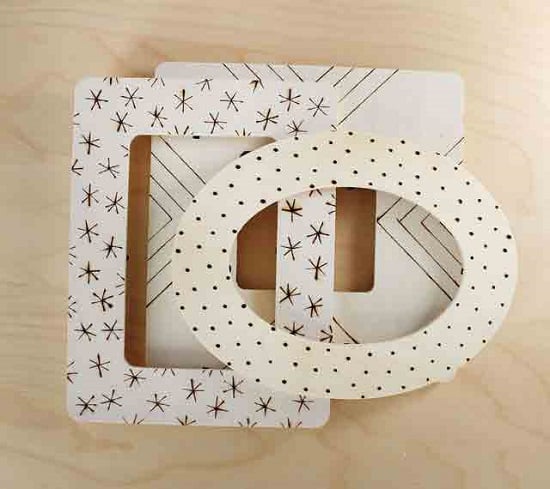
Yep.
We are talking about major changes here.
Something that will make your plain-old wooden photo frames POP instantly!
However, the process is much simpler than you think and you can even let your kids handle this easy-to-do DIY project under your supervision.
Just pick a plain photo frame ad start drawing patterns all over its borders. You can draw little stars, dots, mini-circles or even parallel lines to make the photo more interesting.
#9. Let’s Spice Up The Work Life
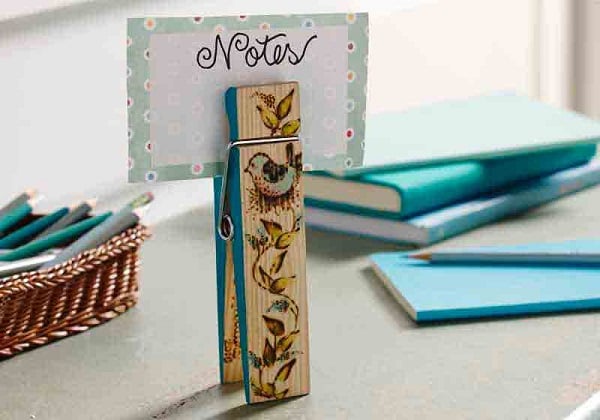
Your work life doesn’t have to become boring no matter what type of job you do!
Little changes here and there are enough to pass the working hours with a slight smile on your face if you only know some little tricks!
For instance, instead of writing up your to-do lists on a regular notepad, you could clothespin note clip to bring a little fun vibe into the environment!
Even better, you could add little details on the clothespin using a decorative woodburning tool quite easily!
We recommend using some acrylic paints as well to make your design stand out from the rest.
#10. Make A Customized Accessory On Your Own
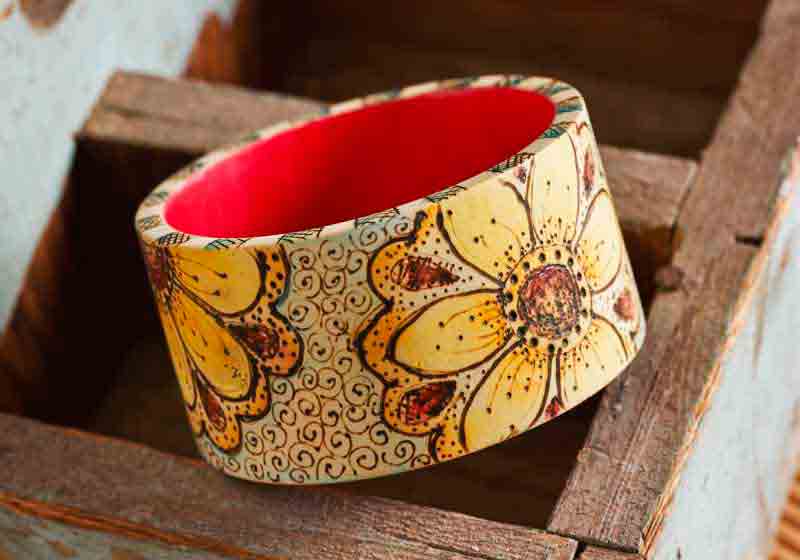
A bracelet is something girls love to adorn and one of the most common accessories found in a jewelry box.
If you own a wooden bracelet by any chance or would like to have one, then this idea is sure to help you a lot!
So, the plan is to make the bracelet match your outfit and that’s why we suggest picking a specific color of your choice and making it the focal point of the jewelry.
To make the color pop, outline the design with a woodburning tool and add the final touch by using a sealing agent to keep the pattern last forever!
#11. Create A Keepsake Treasure Box
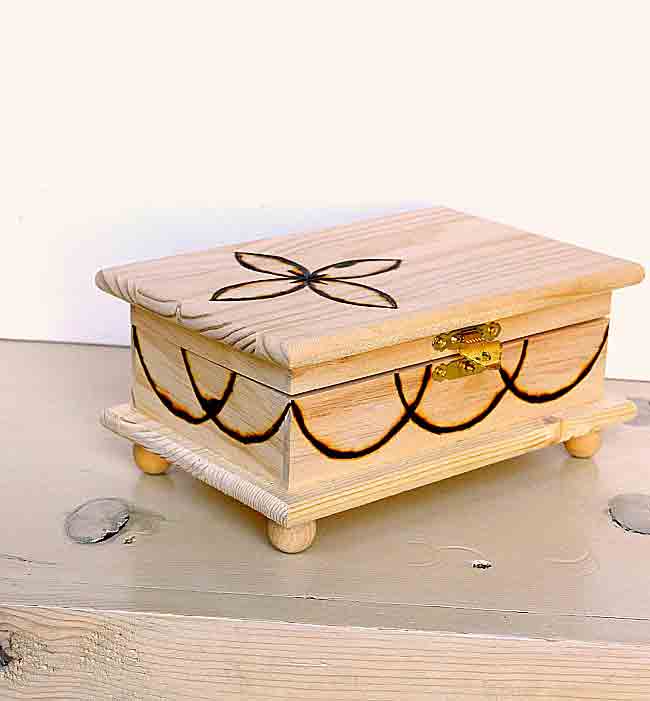
Once you start your journey on woodburning projects, you will have a hard time to stop practicing!
To quench your thirst, we have found something that’s fun, a little bit challenging and quite useful in our daily lives!
Ready to hear?
Well, it’s a keepsake box!
And the best part is, you don’t have to a skillful artist for this one.
Just draw a nice flower design with big petals and add some small details to keep it interesting.
Leave the pen tool a bit longer if you want to achieve a darker shade on this one.
#12. The Smallest Things Often Make The Biggest Differences

If you and your siblings fought over who can give the better gift to your mom all these years, then get ready to win this year with triumph!
A hand-made gift tag alone should win you the prize!
And it’s so easy to make as well!
Simple use a pencil to trace out your desired words like “mom” or “I love you” and then later fill it in with a pyrography pen.
All that’s left to do is to give her a warm hug that she deserves for all her hard work on you guys and that’s a complete wrap!
#13. Treat Your Furry Friend With New Dishware
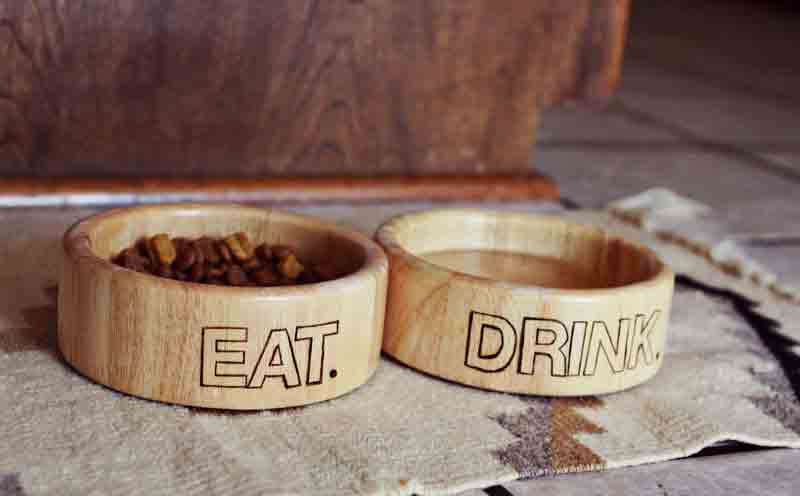
Although pets can’t write or read, you can still decorate their dishware a little bit to add a nice touch to your home interior!
There are a number of ways you can nail this look.
However, we are going to teach you the easiest way we could come up with!
Collect some alphabetic stickers for this project and put them up on the side. Wait a few minutes and then trace the letter’s edges with the pyrography pen.
Once you are done tracing all the letters, remove the stickers and enjoy the finished look, which now seems as if it’s done by a professional!
#14. Father’s Day Special
We all know and admit the sacrifices that mothers make for us.
Fathers, on the other hand, like to remain in the shadow and stay hidden in this scenario!
Well, not anymore!
This Father’s Day, it’s your turn to do something special for him!
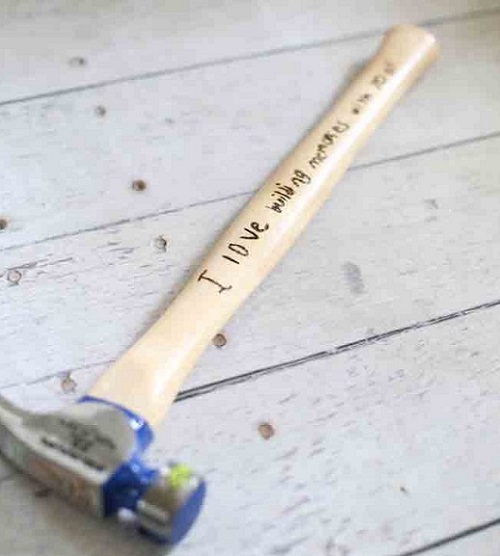
For instance, if you and your dad have spent most of your days working in the garage, then a nice idea would be to gift him an engraved hammer this year!
Not only it’s something he will LOVE your thoughtful gesture, but also, he will have a great time working with this tool at the same time!
#15. Make Stylish Handmade Earring
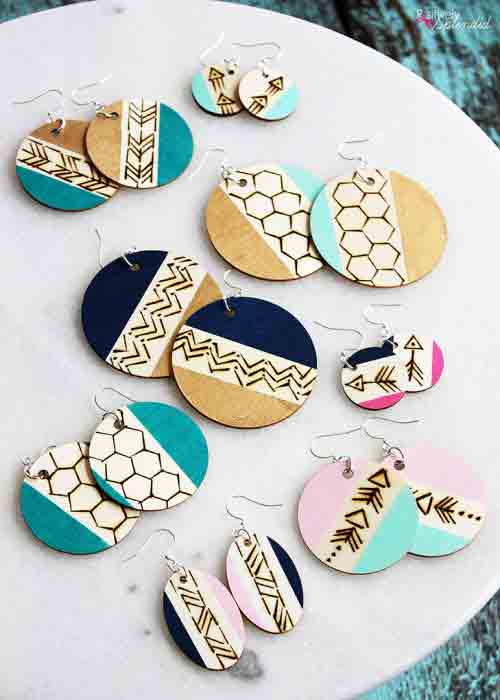
Earrings are the perfect item to gift someone, even if you have the smallest budget!
You need thin slices of wood that are mostly used for making jewelry or embellishment, painter’s tape, acrylic paint and a pyrography pen for this purpose.
Once you are done with the project, don’t forget to attach big hoops to the end and show your new-found talent to your friends and family!
Tips For Your Wood Burning Project
- Every time you switch the pen tips, so remember to clean the pen tips properly in order to avoid any kind of carbon build-up in the future.
- Before burning design on the wood, lightly make an outline of your work with a pencil to avoid any mishaps.
- It’s a good idea to sand your wood so that the details come out a lot nicer on the given surface.
- Start with slow, lightweight pen movements and increase your pace from that point onwards to reduce any accidental burning.
- You can also print a digital copy of a pattern from the internet and then transfer the design using a graphite paper onto your desired wood.
Wrapping It Up
Got a bit carried away and burnt the pieces a little too much?
Don’t worry!
You can easily salvage it by rubbing an ink eraser over the spot or simply scraping bits and pieces from that particular area and lighten it up!
Hopefully, you have got inspiration from some of our easy wood burning ideas for beginners and try them out in real life to see how well you can express your creativity through this craft.
And don’t forget the most important thing, which is to have fun as well as spread love and kindness to other people along the way!