Are you looking for ways to decorate your home without spending too much money? Or maybe you’re trying to find a personal and unique gift? If so, then resin coasters are a perfect choice.
Coasters are easy to make, and a great addition to any home.
On top of that, you only need a few simple tools to get started. Making your own coasters at home adds a great personal touch, and gives you endless customization options for your choice of colors, shapes, and decorations!
If you want to make resin coasters but don’t know where to start, then you’re in luck – this handy guide will teach you everything you need to know about how to make resin coasters!
So let’s get started, shall we?

What You’ll Need
Before you can jump into making your resin coasters, you’ll need to gather some supplies. Here’s a list of what you’ll need.
You Need
- Epoxy Resin
- A Mold (if you have one)
- Four Strips of Plywood
- Disposable Plastic Cups
- Craft Knife
- Tape or Wood Glue
- Sandpaper
- Popsicle Sticks
- Disposable Gloves
- Colored Pigment and/or Decorations
- A Lighter
- Greaseproof paper
- Cork or Rubber Coaster ‘Feet’
The resin is the most crucial thing you need, for obvious reasons.
Epoxy resin typically comes as separate components that need to be mixed. 2-part epoxy resin is the simplest variety and is the most convenient to use, as it only contains the resin and a hardener.
You can also get resin kits that have each component pre-measured so you’re guaranteed to have the right proportions. In terms of the mold, a pre-made silicone one is ideal.
These are cheap and easy to find online, and come in pretty much any shape you could imagine. You can also make your own basic mold out of pieces of balsa wood/plywood, although you’ll mostly be limited to simple squares.
How To Make A Resin Coaster: Step-By-Step
With everything you need set up, now you can start making your coasters! This simple guide will take you through each step along the way.
1. Make Your Mold (If Necessary)
If you don’t have a pre-made mold at the ready, you can make a simple square one in just a few minutes. For this, you’ll need your pieces of wood, tape, and a craft knife.
The best pieces of wood will be around 6″ long, 2″ wide, and ~1″ thick. Check to make sure that all the pieces are the same size, and that all of their sides are smooth and level. From here, you can tape them into a square frame. There are two ways to do this.
Your first option is to simply tape them into as accurate a square as possible. The best method for this is to overlap the top of one piece’s large face with the smallest edge of the next piece, overlapping each strip until you’re left with a square.
However, this is less stable and harder to tape in place.
Alternatively, you can trim the edges so they interconnect. Carefully use a craft knife to cut a 45-degree angle into both ends of each piece, on the same face each end. From here, you can line each edge with each other and easily tape them into your square.
2. Prepare Your Workspace
When you’re mixing and pouring the epoxy, you’ll want your workspace ordered and tidy with everything you need handy.
Set up some plastic measuring cups along with another cup to mix the ingredients, along with your frame/mold. You should also grab any pigments you have to color the resin, as well as any decorations you want to include.
Lay down a sheet of greaseproof paper, and place your mold on top of it (the paper will protect the surface while also being easy to remove from the hardened resin). Alternatively, if you’re using a mold, make sure it’s dust-free and ready to go.
Finally, put on your gloves and make sure everything is in order. Now it’s resin time!
3. Mix the Resin
As mentioned before, epoxy resin comes in the form of several components. These typically include the resin, a hardener, an accelerator, and a plasticizer, although many resin kits combine these to reduce the total components.
2-part epoxy resin is the most convenient, and it’s easy to measure out as well.
Using separate cups, measure out your components into the required proportions – for 2-part epoxy, this is a 2:1 ratio of resin to hardener. Don’t mix them straight away, as the mixture will start to harden as soon as they combine.
Get a popsicle stick handy to start stirring, and then pour the two ingredients into a larger cup.
Use the popsicle stick to stir the mixture thoroughly until both components are completely combined. If you have any coloring (such as pigment, dyes, or paint concentrate), you can add these to the mix.
Stir the color into the resin thoroughly. If you’re using multiple colors, should portion the resin out into separate cups and color them each individually.
4. Cast The Coaster
Now it’s time to put your new resin to good use. Whether you’re using a mold or a homemade frame, the steps here are pretty much the same (although you’ll need to be more careful of leaks if you’re using a frame).
Carefully start pouring the epoxy resin mixture into the mold. Pour slowly to avoid any air bubbles getting trapped, as these can impact the coaster’s appearance.
If you want to put decorations in the coaster, such as flowers or a picture, only fill the mold a small amount; when this layer has dried, you can add the decorations and top up the mold with a clear or lighter-colored coat.
You can also get some great patterns if you’re using different colors by pouring them in at the same time from different sides of the mold.
No matter how well you pour the resin, you’re going to be left with bubbles. Don’t worry – these are easy to get rid of as long as you catch them early.
When you’ve finished pouring the resin, give it a light shake to even it out and leave it for 10-15 minutes.
After this, you’ll notice that all the bubbles have risen to the surface. Using a simple butane lighter, carefully and slowly wave the flame near the surface of the resin to pop the bubbles.
A heat gun would work much better, but a lighter is a much more convenient method.
Now all you need to do is let the resin dry! This will take up to 72 hours to complete, so be careful to let the coaster stay in place for this entire time, and maybe set up some dust covers to keep it safe.
5. Remove From Mold And Add Finishing Touches

When the resin has fully cured, you can take it out of the mold. For a silicone mold, all you have to do is peel the silicone away.
Meanwhile, for the homemade frame, you can cut the tape and remove the wooden pieces, and peel away the greaseproof paper. But while your coaster may have dried, it’s not finished yet.
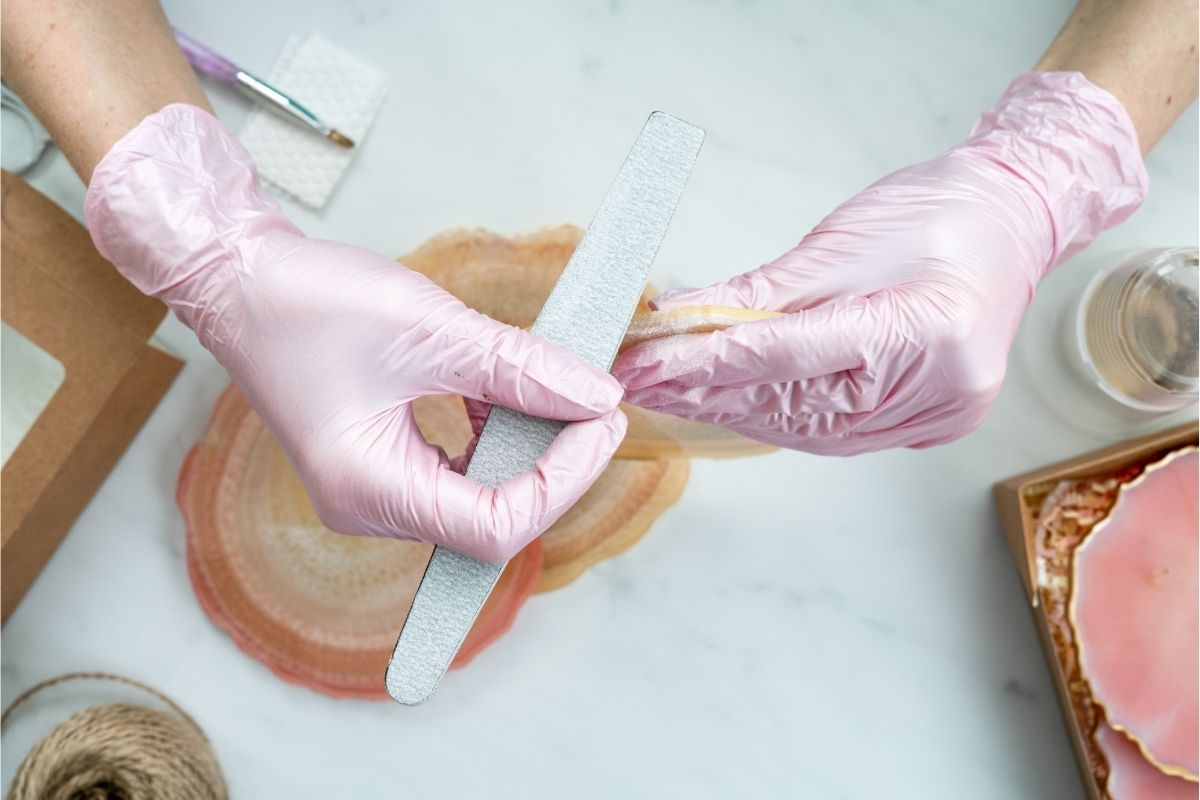
You might notice when you take your coaster out of the mold that some of its edges are rough and that the corners might be too sharp. To remove bumps, splinters, and rough resin, you’ll need to sand the coaster.
Use sandpaper along the edges and sides to smooth out the resin and round it out to a more comfortable edge. Try to avoid sanding the main face if necessary, as the scratches can damage the coaster.
To finish off your coaster, give it some ‘feet’ made out of rubber or cork. These are stuck to the bottom of the coaster, helping to prevent slips and to stop the coaster from scraping across surfaces. And there you have it – your coasters are done!
Final Thoughts
Making a resin coaster is a fun craft idea for anyone and everyone, whether you want to make a homemade gift, kit out your house, or simply enjoy crafts.
Once you’ve learned how to make a simple coaster, the opportunities are endless. So whether you just want to stick to your custom coaster, or if you want to leap into the world of resin crafts, now you know all there is to know about making a resin coaster!