Many old arts and crafts are becoming more and more common nowadays among the younger generation. They are viewed as hobbies and methods of relaxation. And sculpting with clay has become a very common phenomenon among the youngsters.
If you are someone who is looking to try your hand in sculpting, then we have all the information you will need to learn how to sculpt with clay.
At first, you might find this to be a little complicated, but with time and practice, it is going to become much easier than when you start.
So, be ready to get your hands dirty with some clay!
How to Work with Clay to Sculpt
There is a process you will have to follow if you want to accomplish sculpting with clay. And for beginners, it is very crucial to follow each step of the process so that they do not come across too many complications and confusion while on the task.
Sorting the Material
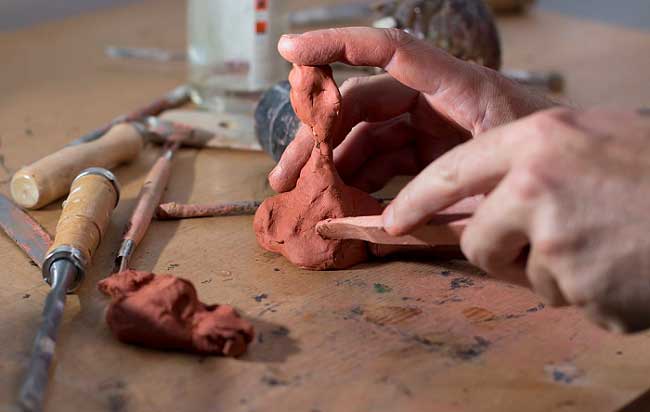
Before you actually get on the task and start sculpting, you have to sort out and select all the materials and tools you need in order to achieve what you set it to do.
Step 1: Selecting the Clay

You have to start out by choosing the kind of clay you will use to sculpt. There are clays of various types that you can use, and each of them has its own uses and advantages, for which you might pick one over the other one.
If you do not have a kiln, then you can choose between polymer, air dry clay, and oven bake.
The kiln is used to harden the clay so that after you are done shaping it, the structure you created, can dry down and won’t change shape. The mentioned clays do not need a kiln to dry.
So, that is a much more convenient choice for you if you are just starting out.
Polymer is a great option if you want a bright clay that is a bit on the vibrant side. The oven bakes one can be made and baked at home, even though the output will be of a much smaller scale.
And finally, there is the air dry clay that is one of the most convenient options you will find in this department.
Whichever one you end up selecting, it will have the same outcome as the standard clay.
Step 2: Work with Standard Clay for a Glazed Finish
Now, if you are looking to give the structure you created a bit of a glaze or a different finish other than the matte one, then you will have to work with the standard clay.
All these additional work cannot be done with the options mentioned in the previous step.
The standard clay comes in various shades, so here, you must pick out the shade you want your sculpture to have.
Now, if adding a glaze is what you want for your structure, then you will also need access to a kiln. It’s not really possible for you to have one at your home, or for you to invest a whole lot of money on buying one as you are just starting out.
So, the best option for you would be to contact a pottery shop nearby and rent their kiln. This will cost you much less, and you will still be able to get the same results out of the structure.
Step 3: Protect Your Work Space
Clay is not the cleanest material to work with, it can get everywhere, and the cleanup process is extremely long and tedious. You will need a lot of manpower to get that job done.
So, to save yourself from the hours of unnecessary labor, you should cover the work area with newspaper or cloth that can be easily discarded.
Something like this is especially important if children are the ones playing and making shapes and structures with the clay. They are more likely to mess up space.
So, you can even opt for taking the whole activity outdoor to avoid making a mess inside. You will not have to worry about dried clay on chairs and tables.
Step 4: Choose Your Outfit for Work
Just as you have to be aware of what happens to the workspace and how the whole place can become a mess very quickly, you also have to consider what effect the activity will have on the clothes you are wearing. Well, for one, you will have a very hard time getting it off your clothes.
Therefore, it is best you wear something old or are less likely to wear outside. So even if you do end up smearing some clay in it, you will not have to worry about how the item of clothing will look like with the stain or mark left behind.
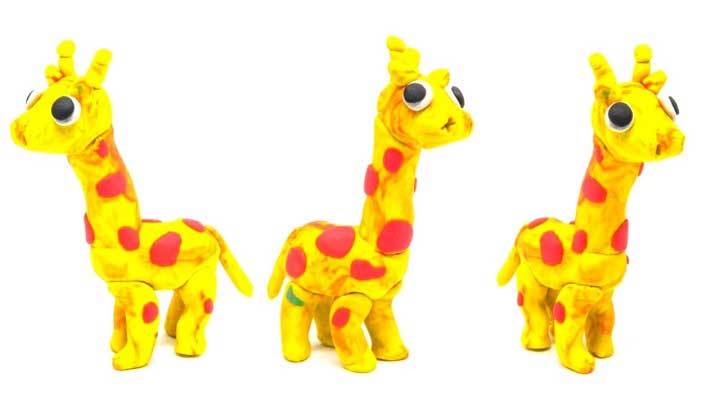
Step 5: Choose What You Want to Make
If this is the first time you are working with clay, and have no idea what or how you want your end result to look like, then the best thing for you to do would be to search the internet, and find a structure and design that you like and want to replicate on your own.
Make sure the design you choose goes with the level of your skillset so that you do not end up disappointing yourself when the end-product does not end up looking like the one you saw online. And for that, you will find many different structures perfect for first-timers.
If you do not want to take help from the internet and want to make something of your own, then you can go that by sketching out the design on a notepad and a sketchbook.
You can make the design based on what you see around you or whatever inspires you.
You can also read this for more professional tips:

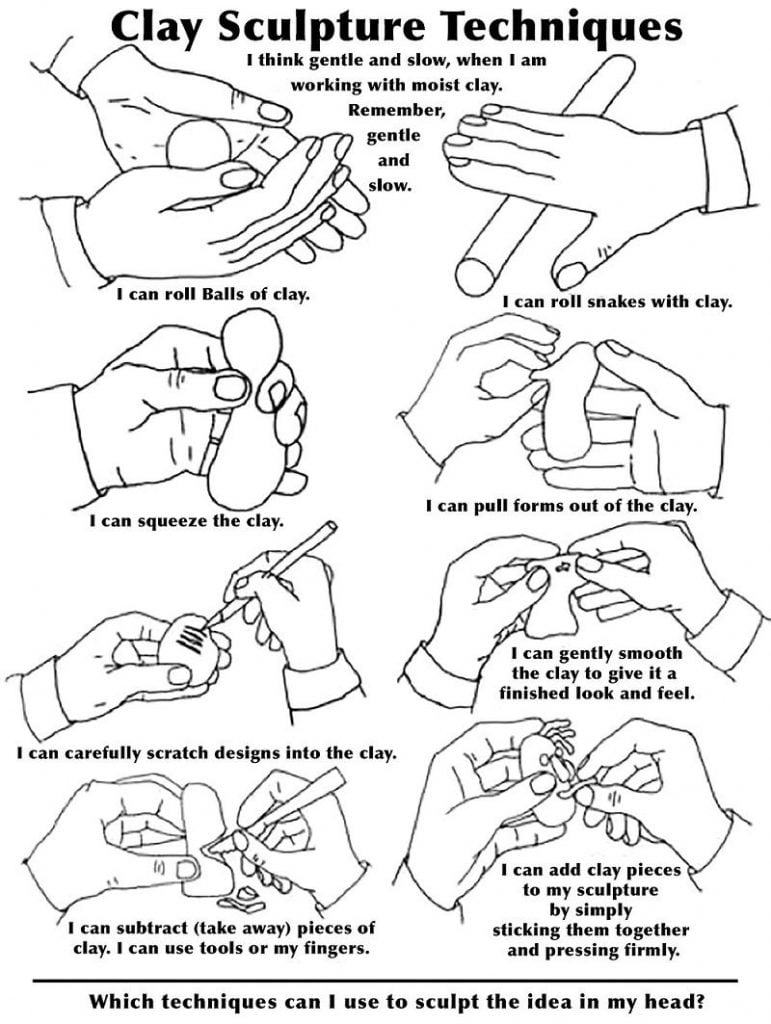
Understanding the Sculpting Techniques With Clay
We are all done with our basics. The material has been selected, and you have also made sure everything is safe from getting ruined with clay. And the design of the structure you want to create has also been picked out.
All you have left to do is understand and master the techniques you will have to employ to make it all happen.
1. Kneading Technique
How you knead the clay is a very important part of the whole sculpting process. So, you must figure it out before you start with any of the structures.
First and foremost, you are to carefully place the block of clay on the workspace you covered up with the newspaper. Now, you can start off with the real work.
For this you will need a knife, it does not need to be too sharp, it will only be used to separate the clay into two portions.
After cutting it into two, you will place one of the pieces on top of another and press them together with your fingers. Make sure you knead them properly to get all the air bubbles out of it.
Once you have them mixed well together, you will need to use the knife again to cut the clay into two. You will repeat the process again.
The second time is not the end of it; you will have to keep repeating the steps so that you do not have any air bubbles trapped inside the clay.
Constantly kneading the clay will make its texture much better, and you will also have much better results because of that.
2. Pinch to Get the Desired Shape
When it comes to clay and sculpting, art has been around for a very long time. Thus, there are many different methods of doing it that date back hundreds of years.
One such method is pinching the clay until it takes on a different shape or form. How you pinch the clay will determine how it is going to look like.
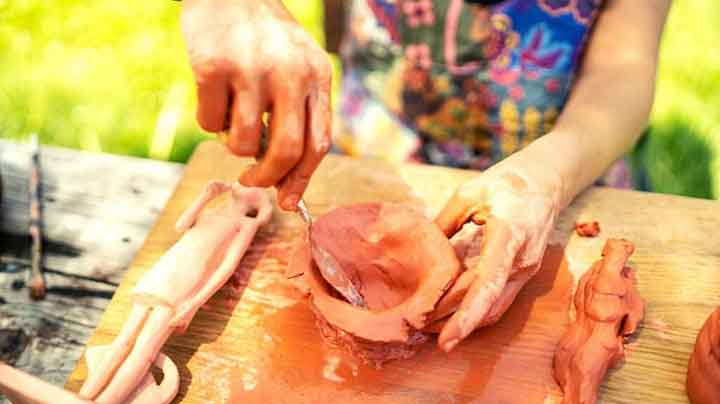
As a beginner, it would be best for you to start out with something comparatively easy, and what is easier out there than forming the shape of a bowl. In order to do it properly, there are certain steps you will have to take.
- First of all, you have to take a handful of clay and roll it up until you have made a ball out of it.
- Then you have to flatten the ball a bit, to do that it would be best to place the clay back on the workspace and push lightly.
- Now, you want to create a type of base for the bowl as well the top opening, for that, you have to take the pad of your thumb and push till you have the desired effect on the clay.
- Now, all that left for you is to pinch the clay around the opening of the clay till you make the side of the bowl,and this all there is to the pinching.
Obviously, this method can be used to make better and more unique shapes and structures, but we must start out from the basics before we can reach the top of the tier.
3. Making Coils
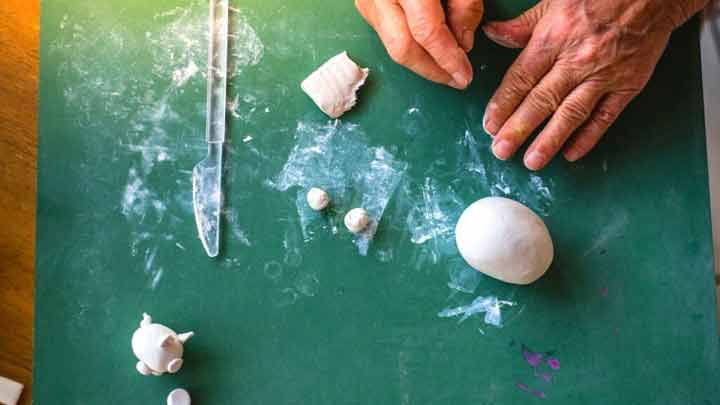
It is not possible to start working on the clay straight away; you will have to first shape them up in a certain way, only then those can be used to make other objects. Like with the bowl, you would have to make it into a ball first.
Just like the ball, the coil is also a base, from which you can change the shape of the clay to other things. For this, you will at first have to roll pieces of clay into balls. The amount of clay you use from each of the balls will depend on how big you want the object to be.
Now, you have to roll the ball with your palm until you form a thin strip using the clay, then the strip has to be rolled into the form of a coil.
Make sure the width of the strip is even all around. Otherwise, your coil will not look right. Just try to keep in mind that the length of the coil will have an impact on the size of the structure you make.
4. Create a Vessel
Once you have lined out a few of the coils, you might decide to make some sort of vessel out of it. Using the coils by stacking them on top of one other might be a great way to form shapes and structures.
I have said before, just remember the coil’s length will determine how large the object will end up being.
How would you go about forming the structure with clay?
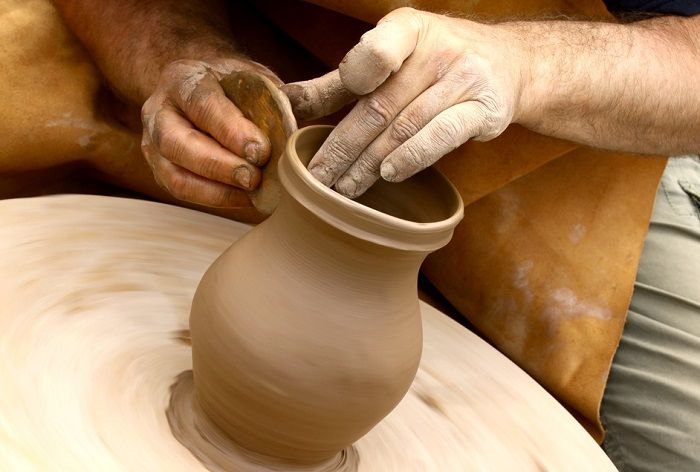
- Say, for example, you are making a circular vase; in this case, you will have to join the ends of the coil with one another so that a circle is formed. Then you have to put each of the coils on top of one another so that it can get some height.
- When you see that the height or length is to your liking, then you know it is time to press them towards one another so that each layer of the coil sticks to the other.
- Once all the coils are stuck together properly, you should smooth down the sides so that it looks good, and has a more clean and refined finishing.
With that, you should be done with the whole process of stacking the coils to form the vessel of your choice.
But remember, if the coils are not well made, then your structure will not be stable either. You might have to end up redoing the whole project. So, try to get the coils right the first time.
5. Form Slabs Using Clay
Much like you did with the coil and the ball, you will also have to form slabs using clay to make other structures, such as boxes or houses. The slabs have to be stacked on top of one another for you to get the desired results from the clay you are working with.
Now, to get something more creative and unique, the slabs can be stacked and shaped using stencils. You can form whatever you want, using some tools and clay.
How will you make the slab and then turn it into something else? Well, to answer your question, we have a whole process laid out, following this will definitely help you get the shape of your choice.
- As you would do with all other types of forms and structures, here you have to start out by rolling some clay into a ball. Take as much clay as you need based on how big you want the structure to be. For this next bit, you will need a rolling pin.
- What you have to do is press down the ball you created, and then must use the rolling pin to roll the clay out. Keep doing it until you have the same thickness throughout the clay.
- After that, you can take help from a ruler, and measure out how much you want to cut, and how big the pieces are going to be. You can cut the rolled out clay into as many slabs as you want or as much as you need for the structure you will create.
- Now you have to make small cuts along the edges of each of the slabs; you have to do this so that when you put the slabs over the others, they will join together easily.
- By now, you are ready to stack them up. When they are put to place, all they have to do is put a little bit of pressure, so they stick to each other. This is how you will form a cube that can be used to make other structures.
With that, you are done working with the slabs.
Learn to Create and Design with Clay
You have, by this point, learned a few of the methods and techniques on working how to sculpt with clay. Now, it is time you learn how to create some structures using the clay, and then how to design using them. So, here is how you are going to get started.
Step 1: Join the Forms or Shapes Together
Well, in the previous section, we said how you could make a few basic shapes like the coil or slabs. So now, it is important for you to join all these elements together so that you can end up making a structure out of them.
In order to join them, you have to make small cuts along the edges of the coil or the slabs; these cuts are made so that you have an easier time connecting them with each other.
When you have made the cuts in all of them, you have to stack these on top of the other.
After that, you have to press down hard enough so that they join and form one shape. If they do not connect properly, then there is a chance it will separate, and that will ruin all of your hard work.
Also, keep in mind you should not press too hard and change the form of the clay. And for natural clay, add a few drops of water.
To make more changes to the structure, you could use the pinching technique we spoke about before. It can help you add a more unique touch to the whole form and make it more customized to your liking.
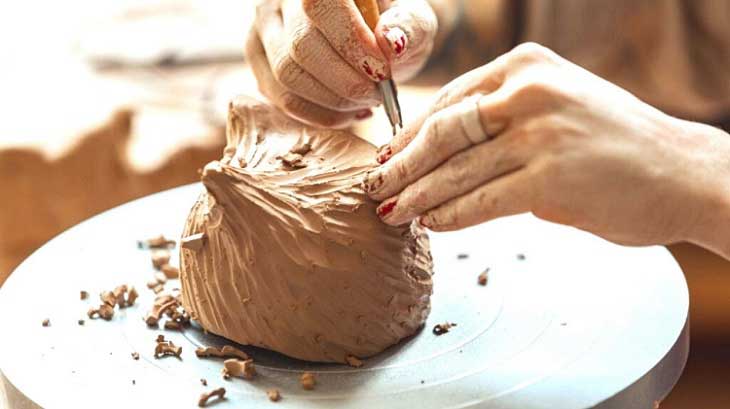
Step 2: Create Texture of the Surface
Most of the time, we tend to make objects with clay using our hands and fingertips. And for the most part, they do the job pretty well and can actually help you out to make a shape you want to. Like pinching the clay enables us to add something more to the form.
But out fingers are not our only assets while sculpting with clay, you can use different types of stencils to form texture on the surface of the clay. There are many stencils available in the store made specifically for this task. You could also use your daily utensils to do the job.
The knife, for example, would be very helpful in creating different designs with the clay. The tip of the knife, in particular, is what you will be needing the most to complete the task.
Remember that you do not have to put a lot of pressure on the clay. If you do, then you might see some holes poked through.
You may even choose to make use of a fork to make designs along the edges and sides of your clay structure. The prongs of the fork can help you make three long indentations on the clay, which can be made into a design as well, and you can also use a spoon to make shallow dents on the clay.
Like I said before, the designs are not limited to just these, you can use different things to carve out different designs. All you need is a little bit of creativity.
Step 3: Use Different Materials to Decorate

The clay before drying is mostly sticky, and you can pretty much attach anything to the surface, and it will stay put. So, in order to beautify the clay sculpture you created, adding a few materials is a very good solution. It will surely make the structure more unique.
You can use objects like stones, small mirrors, or even small rocks to the surface. All you will have to do is place it in the clay sculpture, and then add a little pressure to it so that it sticks properly, and does not come off before the clay has had a chance to dry completely.
Also, if you are using natural clay, then you will need a kiln to dry the clay. The kiln exerts a high level of temperature in the structure to solidify it completely.
Therefore, you have to be careful while picking the material you place on the clay. A mirror in such heat will shatter, but that is not the case for rocks.
You might even opt for adding a little bit of sparkle to the sculpture. All you have to do is pour a bit of glitter in the desired areas, and then press it in well.
That should be enough to make the glitter stick. Well, we all know how difficult it is to get rid of glitter anyways.
Step 4: After the Sculpture Dries, You Can Add Paint
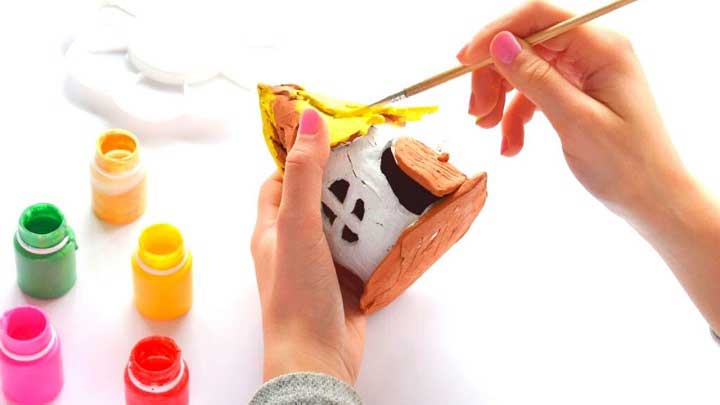
Many people make the mistake of painting the clay when it is still wet, well, that is not the way it goes. You have to make sure it is done after there is no water content left, and there is no chance of the clay changing its shape. Paint may add extra moisture to the clay, and that will completely change its drying time.
How long it takes for the structure to dry will surely depend primarily on the type of clay you decide to use. Whichever type you use, should have the time mentioned somewhere in the package. So, it will not be too hard for you to figure out how long it will take.
The painting part of this process is something people seem to enjoy a lot, as you can do absolutely anything you want now.
Draw anything you like on your sculpture. Just keep in mind that it cannot be moved for 24 hours after it has been painted.
Step 5: Use Images and Videos as Inspiration
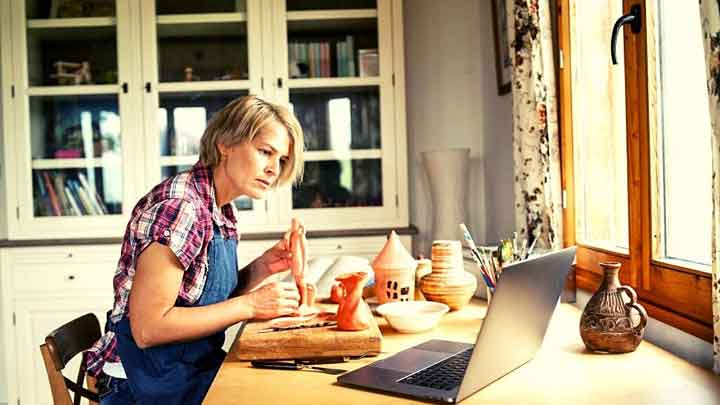
We tend to look for inspiration whenever we are making or designing something. Sometimes it’s for makeup, henna, or even painting. The same can be applied to these clay sculptures. You can look for things you like, and then try them out on your own structure.
There are also countless videos available on the internet to help you out with a specific kind of design if you are confused about how to do it.
You should be able to follow along easily if the videos are made specifically for beginners who are just starting out sculpting with clay.
And if all else fails, you can always choose to join a pottery class for beginners. You can take help from the teachers in these classes if you are confused about anything.
Final Thoughts
You have to know that it is not possible to achieve perfection on your first try. Better try to keep working, and trying to perfect your techniques. So that your sculptures come out looking better and better each time.
Other posts you may find helpful: