Are you someone who likes to make your own things?
Well, if you are one of those people, then piecing together quilt backing might be something you are curious about.
However, it is not an easy task; rather, you will need a ton of information regarding the dos and don’ts.
Along with that, you’ve to know all the steps involved in how to piece quilt backing.
There is nothing to worry about. We are going to provide you with all the information you are going to need.
Let’s begin.
What is a Quilt Backing?

First of all, you must know what a quilt backing is before you start piecing it together. A quilt usually tends to have three layers sandwiched together; they are the quilt top, batting, and finally, the backing.
The top is what we see, the batting is the padding in the middle, and the backing is the underside of the quilt, the one we get to see when we flip the quilt.
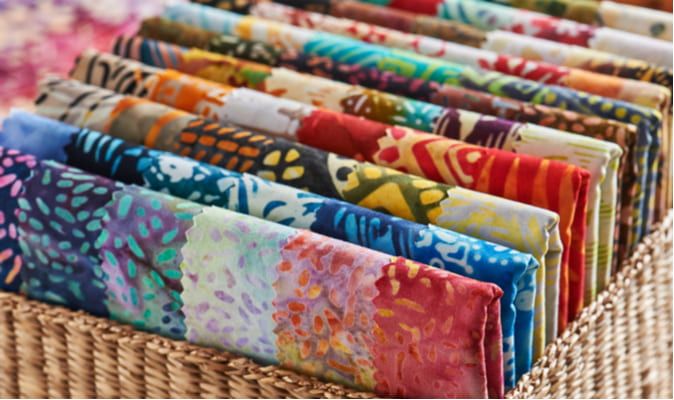
Making the backing will not be very complicated if you know what the requirements are. You can opt for cotton-made quilts or there are other panels of fabric, which are also made for this very job. Either of them should do the work just fine.
How Much Fabric Do You Need?
Now, before you actually get down to making the quilt, you need to know how much fabric you will have to use to make the backing. An important thing to remember is that the material needed for both the batting and the backing will always be more than the amount needed for the top.
This is important as there is a chance of shrinking when the quilt is being made. Well, that is not all; you should also give yourself some room for error or adjustments. You might face difficulties later on if you don’t.
Talking to a professional could also help you out with this task. But, most of them would advise you to add 4 inches from all sides to the fabric for both the batting and the backing. So, the length and the width of the quilt backing will be 8 inches more than the quilt top.
If you want your quilt to have self-binding, then you will need even more material than usual. But, it is not the best way to do so as too much use of the quilt will result in wearing. This method of backing could be a good option if your quilt will not be used often.
Moving on, when you piece together the underside of the quilt, you will have to join panels of the fabric together. However, if you look, you might be able to find wider panels so that you can have a seamless backing. Even though no one will see it as often, but your work will be far superior.
For the exact measurements, you could look for a quilter’s guide, which will give you a better reference and more confidence while doing the work. There you might find all the information about mini quilts as well as reversible quilts.
The Design of the Quilt

One tip that you should take into consideration while making your own quilt is, you can do with any kind of pattern or fabric you want. It all depends on your choice and your preference; there is no one to tell you otherwise.
Also, you should try to match or coordinate the backing along with the top of the quilt if both sides are going to be visible during use. Two very different looking sides might seem a bit unattractive.
However, if visual aesthetics is not a factor for you, then there is no need to spend time pondering about it.
And finally, if you are new at sewing and piecing together a quilt backing, then you should purchase fabric which is a bit busier or has more patterns. This will be better for you as the fabric will take all the attention from the stitches in case they are badly done.
Measurements and Design

Before you make the quilt backing, you should try to design and envision how it might look. This will give you a better idea of what to do. Also, you need to measure out the fabric before you sew them together.
Say, for example, you want to make a 50” quilt. For that, you will have to use a wide panel, which is about 33″ wide, of which 32″ of the fabric will be used, and the rest 1 inch is for the seams.
Along with that, you will need two strips of fabric which are 13.5” each. 9” will be used for the backing itself, 4” are the excess material and .5″ for the seams.
If you are able to calculate it all while cutting the panels, then you will have a much easier time laying each of them out next to one another. And if your measurements are correct, then you will not have to worry about a shortage of cloth when you baste the layers of the quilt.
How to Piece Quilt Backing Step by Step

In order to make a quilt backing with the regular or typical fabric, you have to follow a few steps to make sure the result of your work is cleaner and more precise.
Step 1: Selvages Need to be Removed
Often you will see that fabric selvages can cause it to pucker up in certain places. So you have to get rid of them before you can move ahead with all the work.
This is specifically needed if you use the fabric for quilt backing. While cutting off the part, you have to determine how long or wide you want the fabric to have after the selvages are removed.
Step 2: Single Panels Need to be Cut
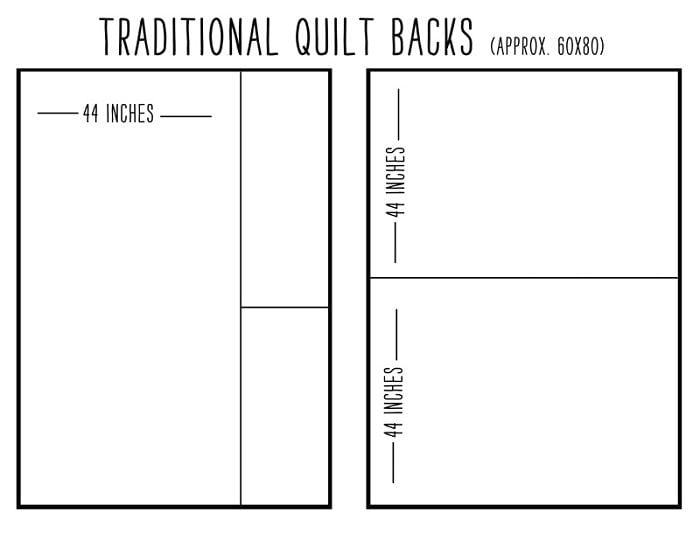
If you want to have a seamless backing, then you will be able to make a quilt of about 35 inches wide. For anything more than that, you will have to stitch the panels of fabric together.
In all of this, keep the 4-inch rule in mind, so the fabric will be 44 inches wide, but for the backing, 4 inches on either side will be left for shrinkage.
In case you do make a quilt with a single panel of fabric, there is no need to cut off the selvages because they will be trimmed off during the whole process.
Step 3: Inches to Yard Calculation
Fabric is sold by the yard, so before you go out to buy the material needed, you should measure how wide you want the quilt to be.
And then add 4 inches on either side to figure out how many inches of material you will need for the job. Then using an online converter, find out how many yards it needs to be.
Step 4: Sewing the Panels Together
If you’re working on a bigger quilt, then a single panel will not be enough, which is why you will need to sew them together.
For this step, you have to align the panels next to each other, make sure you have ½ inch extra on fabric because the extra will be useful for the sewing.
Fold up the ½ inch fabric of the panels nicely so that after they are sewn together in place, there is no bulk of material sticking out. You should also press the entire backing of the quilt before you start putting it to use. It will allow you to have a better experience and finish the job on the right note.
Also, while you are working on the width of the quilt, don’t forget the length and that you need to leave 4” of excess fabric on each end for that as well.
The excess is needed on all sides. If you don’t end up keeping it on the top and bottom, then chances are that your quilt backing will not fit the entire length according to the quilt top.
If You are Working on Large Projects
This is not something you have to worry about or consider if you are making the quilt using a single panel of fabric. However, if you are sewing two or more panels together to make the quilt, then you have to make sure that the panels are not sewn in together in the middle of the quilt.
Many people fold their quilts away after it is used, and constantly folding along the seams of the quilt will lead to quick wearing.
After some time, you will see that the stitches are no longer strong as they used to be, and you might end up ripping the stitching if you are not careful.
Another way for you to avoid the weakening of the seams is by folding the quilt differently each time or changing the folds after some time. Even though you might not always remember to do so, the different folds will definitely help your case and prevent the ripping and the wearing.
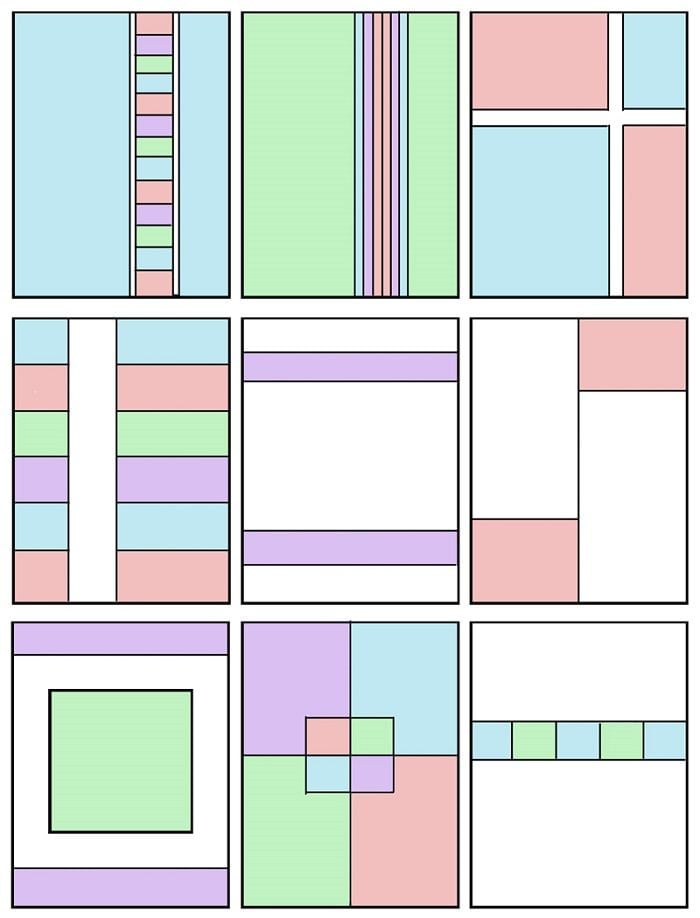
Now, how should you place the panels? Well, for starters, you could use a large section of the fabric for the center of the quilt backing and then use smaller sections for the sides.
In this way, there will be less chance for you to fold along the lines of the seams. However, you will have a bit more work as you have to sew three panels together.
Other Ways to Place the Panels
When piecing together a quilt, we typically tend to place the panels vertically next to each other. However, there are other ways you could choose to do so. Lining them horizontally is also a great option.
You could follow the same pattern of placing the wide one at the center and two narrower panels on the top and the bottom of the quilt. The outcome will be the same, but with just a different orientation.
However, on heavier quilts, this might not be the best option as it could lead to some amount of dropping, which can be prevented with proper batting.
If you want more options, you could opt for placing a wide strip of fabric next to a narrow one. This is a good option too as you have to work less and still not worry about wearing the seams. But, it might not look as nice if the stitches are too visible.
Last Step of Piecing the Quilt Backing
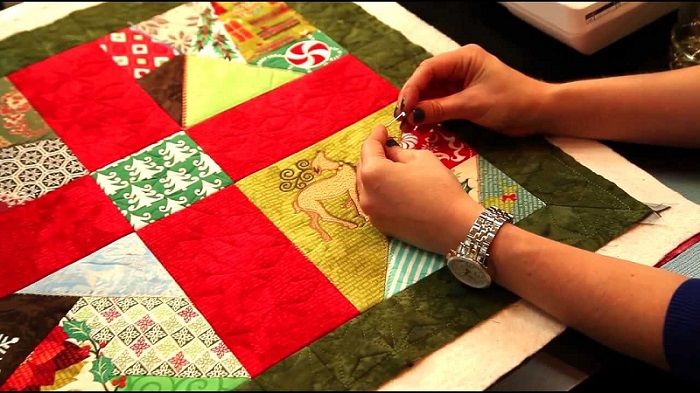
The quilt-making process does not just end with stitching panels of quilt backing fabric together. Rather, after you are done piecing the backing together, you will then have to attach the backing you made along with the batting.
At this point, you will have to use a quilt maker to make sure these two layers are fixed together and will not move.
These machines employ safety pins for the job, but you could even use adhesive to baste them together. You can also stitch them to one another using your hands if you do not have a quilt maker.
And once you put all the layers of the quilt together, you have a brand new quilt for use!
Final Thoughts
While making the backing of the quilt, you will have to keep measuring everything out so that you do not make any type of mistake. With a little bit of attention and care, you will be able to complete the task and see astonishing results.
You can also check these:
- How to read a knitting pattern – Here’s our step by step guide
- Want to buy batting for your quilt? – Click here to read our recommendations