Working with epoxy resin is a fun and gratifying experience. As the contemporary furniture designs look unique with poured resin on top, they could easily be the focal point of an entire room if you want!
However, while working with resin, if you mess up even a little bit, it’s going to attract unwanted attention and comment on your silly mistake.
Does that mean you are going to live with an irregular/uneven epoxy finish forever? Absolutely NOT!
While it’s a bit hard to fix mistakes if the epoxy is fully dried up, there are still some ways you can work around it. Depending on what type of mistakes you made, you will need to find a solution that works best in such a situation.
Want to learn how to fix uneven epoxy resin and get your project back to ideal appearance? You have come to the right place then, my mate. Let’s ditch the blabbering and start fixing ASAP!
What Is Epoxy Resin And What It’s Used For?

Epoxy resin is basically a substance that’s created by mixing it with another particular component. For instance, if it’s mixed with a suitable hardener, then a chemical reaction takes in place which usually lasts for several hours.
The ideal mixing ratio of resin to hardener is 1:1 or 1:2 depending on how you want the surface to look like.
There is a wide range of resins available on the market that are different in hardness, texture and duration of the curing process. Epoxy/synthetic resin can be used for different types of crafting projects.
From fixing stone carpets to sealing worktops in the kitchen, epoxy resin quite useful for different types of applications. You can also do quick repair fixing jobs with special UV-resin, make waterproof sealant for floors, create resin art projects and use as a painting medium etc.
Common Issues That Make Epoxy Resin Uneven

Sticky Surface
Even after the whole surface is fully cured, the epoxy resin still feels a bit sticky/tacky sometimes. This happens for mainly 2 reasons.
Either the temperature was too cold when you applied the resin or the mixing ratio of the resin and the hardener was incorrect.
Dust
You are applying resin on the surface. Suddenly, an insect or debris just fly in, land on in the epoxy, and gets glued. Pretty frustrating, isn’t it?
If the epoxy is wetat that time, then you can easily remove it with a tweezer. However, once dried, the surface becomes uneven on that spot.
Inadequate Surface Preparation
Is your surface clean?
That’s the first question you should ask before pouring resin on top of it.
If the surface you are working on is unclean or has oil on it, it will appear uneven and not-so-smooth after it’s dried out.
Temperature
If you over torch your surface, it’s probably going to create dimples on it.
Also, a perfect resin cure requires the temperature to stay stable at 75-85Degree Fahrenheit. If the temperature fluctuates in the first 24 hours for some reason, then it can result in having dimples on your desired piece.
Porous Material
Porous materials like wood, fabric or soft paper contain lots of air and moisture inside it.
Once you cover these types of components with resin, they still try to breathe through it. As a result, it creates air bubbles in the resin. And this incident may occur even hours after the resin has been applied.
How To Fix Epoxy Mistakes?

Whether you have messed up an epoxy resin countertop, table or garage floor, all of these can be fixed with some simple tricks!
Let’s go through the most common issues one by one and look at the probable solutions for them.
1. How To Fix Dents/Divots In Epoxy Resin?

Dents or divots usually occur when you don’t use enough resin for your project. It may also occur if you continue working even after its pot time has run out.
- If it’s a minor dent (say, the depth measures about one-sixteenth of an inch or less),pour a new coat of resin on top of the surface to even it out.
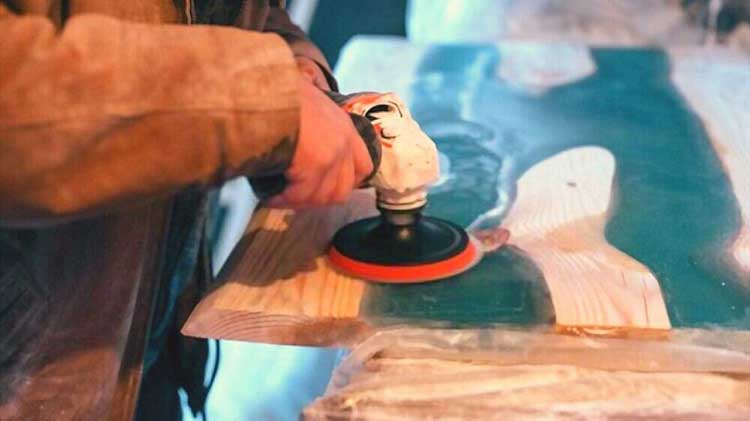
- In case the dent is deeper, you need to sand the surface. Make sure you get the dents to an even surface.
- Create a tape dam around the areas you want to cover so that the resins get to cover the edges as well.
- Pour resin on top in a way so that it fills all the edgesproperly.
- Wait for the time duration it takes to cure naturally.
2. How To Fix Epoxy Bubbles?

As much as we all love blowing bubbles on the air, having bubbles on your resin surface is never a good thing.
If the surface is wet, you can use a torch to blow them off before they get a chance to thicken afterward. However, if it’s already cured, then you need to follow the instruction down below to get rid of hardened ones:
- Sand down the entire surface first. Make sure you cover the bubbly areas properly.
- Take a damp paper towel and clean all the sand residues.
- Apply a new layer of epoxy resin on the surface and make sure it covers the whole area evenly.
- Cover the surface if possible.
- Wait until it gets cured and all bubble-free.
3. How To Fix Waves And Ripples In Epoxy?
Waves and ripples are common problems of epoxy resin, especially when you are working with wood. This ripple designs may lead to a wavy pattern on the surface. Fortunately, there is an easy way to fix this thing!
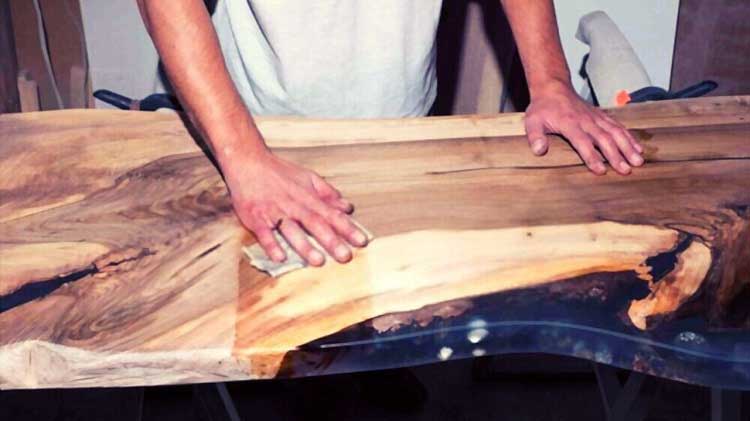
- Go over the resin surface with sandpaper.
- Scratch the ripple lines as much as you can. It’s best to wear protective goggles and hand gloves before doing this step.
- Wipe off all the powdery stuff.
- Get some alcohol on a towel and clean the resin surface with that.
- Wait for a few minutes until it dries up.
- Apply a fresh coat of epoxy resin using a stick (so that it’s a bit thin and even this time) and let it dry on its own.
Tips To Fix Non-Uniform Epoxy Resin

1. After pouring the resin, wait at least 24 hours before testing whether the surface is completely dried.
2. For applying the resin it’s best to use a roller, clean bristled brush or foam to achieve the desired result.
3. Make sure the resin temperature is almost the same as your workpieces to avoid any sort of thermal shock incident.
4. To make a smooth finishing, conclude your workpiece with a flood coat on top. This will help smooth out any uneven appearance.
5. While removing bubbles from the surface, keep moving the torch back and forth to release the bubbles. Holding the torch on one spot for too long may result in burn marks in your wet resin.
Bonus: Preventing Uneven Epoxy Surfaces In The Future!
- The More, The Merrier
When it comes to using epoxy resin, a good rule to remember is: Always use a tad bit more than you actually think it’s needed.
Most resins level themselves after a certain period. For this reason, if you use enough epoxy on the surface, chances are, it’s going to be even out on its own.
- The Magic Lies In The Mixing
Uneven finishing often occurs when you don’t mix the ingredients properly. As we have previously mentioned, the correct ratio of resin to hardener is 1:1 or 1:2. If this ratio isn’t maintained accurately, it may lead to improper catalyzation. Also, make sure you are always using fresh resin and hardener for this purpose.
- Hide Your Project Before The Big Reveal!
Surroundings matter a lot when it comes to the curation of resin.
For starters, you should do your work in a well-ventilated area so that your project gets a chance to dry up naturally.
Also, it’s a good idea to cover your projects as soon as you are done resining. This action prevents any dirt/debris to fall on your desired piece. If the surface is small, you can cover it up with a half cardboard box easily. However, if it’s a bit large, you will need to build a work tent for that purpose.
- Quality Matters
If you don’t want your resin to get yellowed after a while, purchase quality products that contain UV and HALS stabilizer in it.
UV lights are pretty much harmful to epoxy resin. However, these two additives help protect the surface from the sunlight and keep the original appearance intact for the longest time.
- Go For The Second Layer If possible
After pouring the first layer, take sandpaper and gently wipe off any small articles that may lay on the surface. Then, re-pour a second batch just so that it fills out any imperfection the first batch may have. The sanding gives the first layer some sort of tooth on which the second layer can hold onto.
Conclusion
So, what do you think?The next time you work with resin, will you be afraid of making mistakes?
Hope not!
Now that you know how to fix uneven epoxy resin in such easy steps, you don’t need to ask anyone for help in case you make any mistake.
For all the crafters out there, we would like to send a message: Practice, experiment, learn and correct your work. But don’t ever forget to enjoy the whole experience either. Cause that’s where the fun part actually begins!
Hopefully, this article has provided you with all the information that’s needed to have an epoxy resin work that you can be proud of.
Related Articles: