Glass bottles, when emptied, can be used for many different things.
It’s always much better to reuse a bottle for other creative or household purposes than to leave it lying around the house, taking up space, or
Plus, learning how to cut a glass bottle opens up a lot of doors for you to explore your creativity and make some beautiful things for your home. You can make pen holders, vases, or even exciting cups!
3 Easy Ways to Cut a Glass Bottle at Home
Most of these methods require open flames to cut the glass perfectly. While these are all very effective methods, they are also extremely dangerous. So it is essential that you be wary when you work.
Keep flammable materials away while you work, and do not let children try this or be around when you do it.
Method #1: Using a Glass Cutter
This calls for an open flame, possibly a candle or a torch. For the first step, you will need a glass cutter or glass drill bit. You can probably get all this at any good hardware store.
- First, with the glass cutter or drill, draw a line where you want to cut the bottle. This way, you will be able to decide where to hold your flame, and the heat itself can work with more precision.
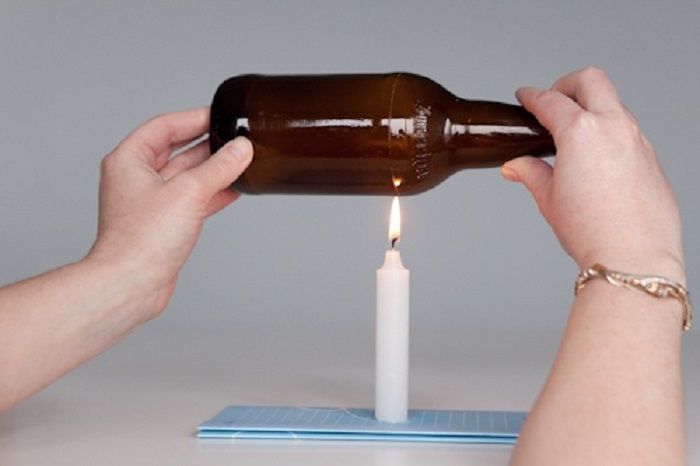
- Once the line is cut, hold the bottle directly over the open flame. Make sure the fire is hitting the line you marked out. Rotate the bottle slowly so that the heat can spread out evenly.

- You will also need a bucket of cold water, which you can use to dip your hot bottle in. Every few minutes of heating, you must sink the whole bottle into the bucket of cold water once.
- Then, go back to heating the bottle again. This process must be repeated until the bottle has been cut entirely.
You will notice that the cut glass still has some jagged edges. You don’t want to risk cutting your hands, do you?
So, you must smoothen the edges down with some sandpaper! These can be found at hardware stores as well and are supposed to be very rough.
Method #2: Boiling Water Trick
This process is similar to the one with the flame, but this is a little less hazardous. Being careful is a recommendation since you will be working with boiling water instead of an open flame, which is still a hazard.
- Like the first step in the first method, you will want to mark your bottle at the desired spot. Make sure the line is as even as possible, and that you don’t mistakenly mark somewhere you don’t want a cut to be.
- Prepare a bottle of hot water and a bottle of cold water. You could also just stand near a sink while you do this, making that your source for cold water.
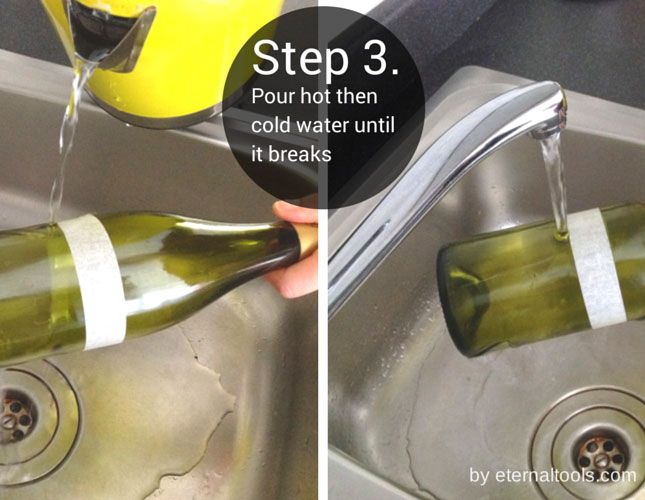
- Now, alternatively, pour hot and cold water over the marked line on the bottle.

You will have to repeat this process several times until the bottle cuts off cleanly. Once it does, use sandpaper to smooth down any rough bits on the edge. I can assure you that there will be a few.
Method #3: Yarn and Acetone Method
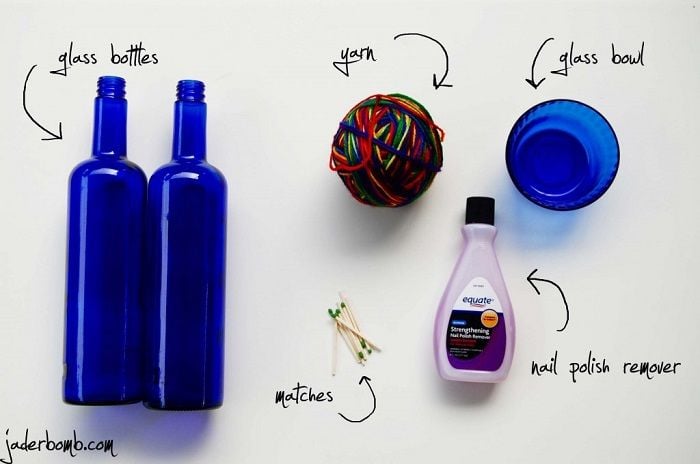
Another simple but slightly risky trick calls for a short length of yarn and nail polish remover. You can also use pure acetone, but assuming remover is more common in households, you can just go with that.
Accessories:

- Wrap the piece of yarn or even a cotton string, a ¾ times around the place you want to cut the bottle at. Tie up the piece and remove spear string. Next, you want to get a bowl to pour out the acetone.
- Slide the piece of yarn off the bottle and soak it completely in the acetone. Once it has been properly soaked, take it out and tie it around the bottle again. You would want to keep each string close to the other, so the glass makes a clean break.

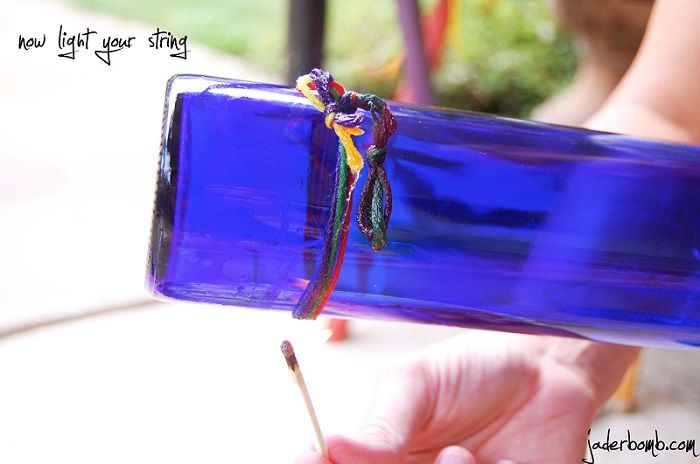
- Take a lighter, candle or match and light the yarn on fire. Once the string is lit, turn the bottle around slowly and continuously, so the fire spreads out all evenly, distributing heat everywhere.
- For this, you must keep a bucket of cold water ready for dipping. Oversee the fire and wait until it has burned out. Then, dip the bottle straight into the cold water and hold it right there.
- In a matter of seconds, the bottle will break off at the mark, perfectly. Lastly, get sandpaper and smooth out the edges to use comfortably without causing yourself any harm.
These three methods are all relatively easy for anyone’s use. They require minimal equipment, none of which are tough to use at all. While some techniques are a little time-consuming, the result is always satisfactory.
Final Thoughts
Now that you know just how to cut
You can make different types of holders, vases, and more. To spruce things up, you can give them new shapes, color them, or paint on them. If your friends appreciate quirky DIY projects, you will now know exactly how to get them!
Other articles you may also like:
- How to solder stained glass – Find Out the right way!
- Looking for a stained glass grinder? – Check Our Recommendations!