Oil painting is an enjoyable, creative form of work or art that is often quite celebrated. You may know many artists who were celebrated for their oil paintings and were right to be so. Once you can master this art, you can indeed create beautiful pieces.
But what happens when after a few hours of oil painting, you find yourself incapable of washing off all the paint from your brushes?
While with poster colors, holding the brush under a stream of water is pretty much all you have to do; you will find that this does nothing to oil paint.
Method 1: Cleaning Oil Paint Brushes
Cleaning oil paint brushes may take a few more steps than you thought, but it’s worth it when it comes to such tough paint like that. Plus, with this technique, your brushes will be adequately cleaned and ready for any new colors that you might use.
This process calls for a few different types of equipment that will make your work easier. Note them down and gather your tools to have everything in one place from the start. You will need:
- A rag
- Safflower oil or paint thinner
- Dish soap
- Water
- Hair conditioner
- Cleaning gloves
Now, let’s see how you can put these tools to use:
1. Remove Excess Paint
With your rag or any other cloth you can find, lightly press on the brush’s bristles and pull away. This will get rid of any of the excess paint left on the brush.
Repeat this process until your brush is dry and no more paint drips off it. Make sure you place your brush carefully during this, so no paint drips onto the floors.
2. Thinning The Paint

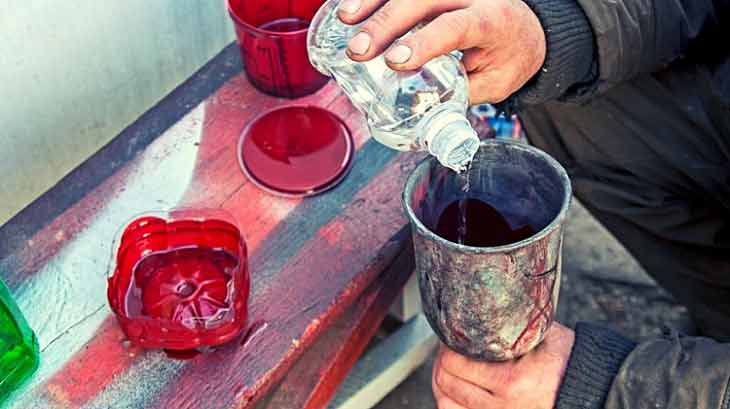
You will need to put the paint thinner or safflower oil in a mug or glass for this step. Fill the glass up to a certain level, so the whole head of the brush can be submerged.
Next, dip the brush in and swirl it around. You might want to brush the base of your glass so that the pressure can get a lot of the paint out. Take the brush out after a few minutes and wipe off the paint with your rag, as you did in the first step.
You may want to repeat this process a few times to get the best results. But you need to make sure that your thinner does not get stained by the paint.
You can set up two more containers with paint thinner and repeat this step. You will notice that the thinner in each container will be less cloudy than the first after use. That just means your cleaning is working.
3. Wash with Dish Soap
You want to take your brush out, relatively clean and dried with the rag. Pour out a bit of dish soap on your gloved hand and start swirling your brush around in that.
Brush back and forth a few times until the soap on your hand turns into the color of the paint you were using.
Next, take the soapy brush and dip it into a container of water. Make sure your water is not too hot, maybe lukewarm, or the glue holding your brush together will start to melt.
Take the brush out, wash your hands, and repeat this cleaning process until your soap stops turning a different color. Rinse out your hand and brush with cold water.
4. Dry Your Brush
Get a new clean rag or cloth and squeeze the bristles of your brush with it. This will get rid of any more soap, water, or paint. If the rag comes out too soapy or colored, you might want to repeat the cleaning technique.
Otherwise, you can move on to the next step with your clean, dry brush.
5. Reshape and Condition
Even if your brush still looks a little stained, don’t worry, that’s normal. If you’re sure your brush is clean, take it in your hands and lightly brush your fingers with the bristles. If there was any stiffness in the brush from the wash, this should get rid of that.
Your brush may also feel quite brittle. If that is the case, you will want to condition and soften it a little bit. But don’t go overboard because too much conditioner could ruin the shape of your brush.
Put the conditioner in a small container and dip your wet brush into it. Once the brush is thoroughly coated, leave the conditioner in for around two minutes. Then rinse it off with cold water. You will see that the bristles are much softer than they were before.
6. Done!
There you go! Now you know exactly how to clean your oil painting brushes effectively. From now on, besides painting, you also know how to clean oil paintbrushes. Plus, knowing this, you can use one brush for various colors and save money and space too!
Method 2: How to Clean Oil paint Brushes Without Paint Thinner
The above was the most thorough cleaning you could go for with your brushes. There are a few simpler, easier processes that work.
However, these may not get out all the color in the oil paint brushes, so go for the above if you want a spotless, squeaky clean brush.
Certain artists don’t mind if colors mix a tiny bit because it’s hardly noticeable. But many do care about the time and effort that goes into cleaning and drying these brushes.
Certainly, these hours could be put to better use. So here are some very fast ways you can clean oil paint brushes.
Alternatives to Paint Thinner

If you are not interested in using paint thinner, you can skip it! Use vegetable or linseed oil instead. Or, you can go for an actual paintbrush cleaner, which you can find in a variety of arts and crafts stores.
Using Alcohol
Rubbing alcohol is a good solvent for paint. Using it can thin out the paint and help break it down faster. Thus, cleaning paint brushes could be fast and easy with this ingredient. Swirl the brush in alcohol, wipe off any dripping paint and repeat until the color is gone.
Turpentine Oil
You can use many different oils to clean your brushes, one of the most effective being turpentine oil. Just coat the bristles in oil, let it work on the paint, then press and wipe off the brush with a paper towel or rag.
Concluding Note
Remember to dispose of all the tools you used correctly. You might have to throw away the rag you used. Remove all the water from the container and clean it thoroughly.
You can, however, reuse the paint thinner, so don’t throw that out. Put it back in its original container if it has not been stained.
Use this method thoroughly and carefully. The paint thinner may do you some harm. So, when working with it, it is always necessary to wear gloves and even goggles.
You should remember to wear clothes that can be thrown out if needed. You don’t want to wear something nice and have it ruined by paint or chemicals.